

Expert Guide to Paint Pickleball Lines on a Basketball Court
If you’re ready to Paint Pickleball Lines on a Basketball Court, you’re making a smart investment in maximizing your recreational space. Converting a single-use basketball court into a dual-purpose surface allows you to expand play options without costly construction. Whether you manage a school, church, HOA, or private residence, properly striping a pickleball layout requires more than just paint and tape — it requires precision, surface preparation, and adherence to official standards.
This comprehensive guide walks you through the correct tools, measurements, and professional techniques to ensure your court meets regulation guidelines established by USA Pickleball while delivering durability and clean aesthetics. With the right preparation and materials, you can achieve a long-lasting, professional result.

How to Paint Pickleball Lines on a Basketball Court the Right Way
Painting over an existing surface may seem simple, but athletic court striping demands accuracy and proper product selection. A regulation pickleball court measures 44 feet long by 20 feet wide, and even small layout errors can affect gameplay.
Essential Tools to Paint Pickleball Lines on a Basketball Court
Using the right equipment ensures straight, regulation-width lines and strong paint adhesion. You’ll need:
100-foot measuring tape
Chalk line reel (blue chalk recommended for easier cleanup)
2-inch high-quality painter’s tape
Acrylic athletic court paint (1–2 quarts minimum)
4-inch roller and paint tray
Stiff broom or leaf blower
Hose with spray nozzle
Two items are especially critical:
Acrylic court paint is specifically engineered for asphalt and concrete athletic surfaces. It resists UV damage, bonds properly to textured pavement, and flexes with temperature changes — preventing cracking and peeling.
2-inch painter’s tape ensures compliance with regulation line width. Since official pickleball lines are two inches wide, this tape acts as a precise stencil.
Official Measurements Before You Paint Pickleball Lines on a Basketball Court
Before applying paint, you must understand the official layout.
A pickleball court consists of:
44-foot overall length
20-foot overall width
7-foot Non-Volley Zone (NVZ) on each side of the net
Centerline dividing each service area
The Non-Volley Zone, commonly called “the kitchen,” extends 7 feet from the net on both sides. This line is critical because it affects gameplay rules — players cannot volley while standing in this zone.
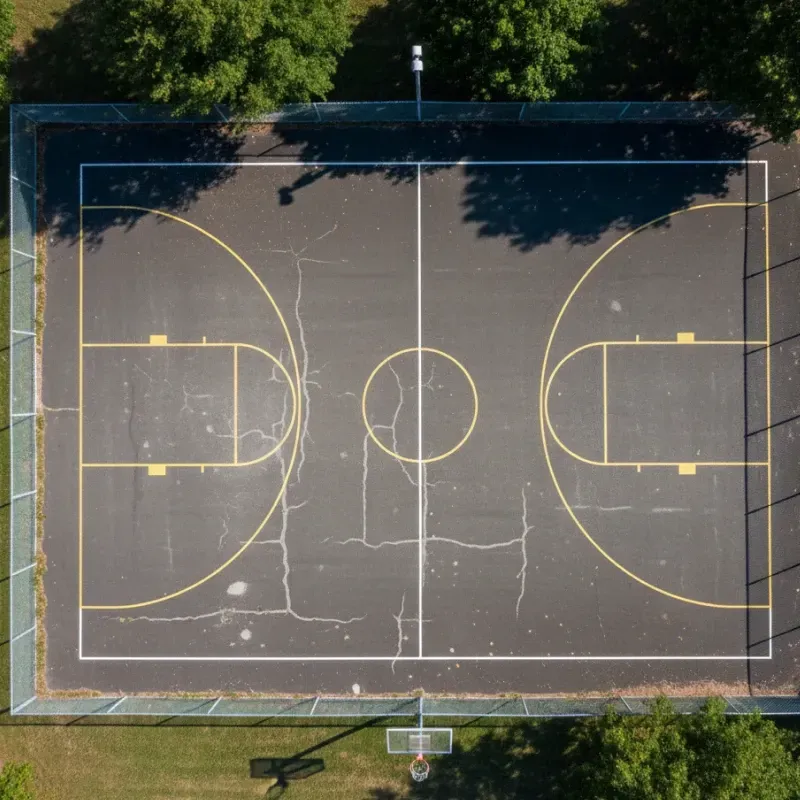
Most basketball courts provide helpful reference points. The free-throw line sits 15 feet from the hoop. Since the pickleball net line aligns under the basketball hoop, measuring 7 feet beyond the free-throw line gives you the correct 22-foot distance to the baseline.
Using existing basketball markings ensures your pickleball layout remains square and parallel to the court boundaries.
Surface Preparation Before You Paint Pickleball Lines on a Basketball Court
Proper surface preparation determines how long your lines will last. Skipping this step is the most common cause of premature paint failure.
Cleaning and Drying Steps to Paint Pickleball Lines on a Basketball Court
Sweep the entire work area thoroughly.
Wash with mild soap and water to remove oils and debris.
Rinse completely.
Allow the surface to dry 100% before painting.
Moisture trapped beneath paint causes bubbling and peeling. Outdoor courts must be completely dry before application.
If the court has cracks or surface damage, repair them before striping. Painting over compromised asphalt leads to uneven lines and future failure.
For property owners seeking professional-level longevity and adhesion, companies like Ace Coatings South use commercial-grade surface prep techniques to ensure optimal bonding and durability.
Achieving Perfectly Square Lines
A straight court is not automatically a square court. Ensuring 90-degree corners is essential for regulation play.
Use the 3-4-5 method:
Measure 3 feet along the baseline.
Measure 4 feet along the sideline.
The diagonal between those two points must measure exactly 5 feet.
If not, adjust until it does. This guarantees square corners and professional results.
Taping and Painting Techniques for Crisp Results
Once your chalk lines are snapped:
Apply painter’s tape just outside the chalk line.
Press edges firmly using a card or firm object to prevent paint bleed.
Apply thin, even coats of acrylic court paint.
Two thin coats outperform one thick coat. Thick applications tend to crack and peel over time.
Remove tape when the paint is tacky — not fully cured — by pulling at a 45-degree angle. This prevents tearing dried paint and ensures razor-sharp edges.
Allow 24 hours of curing before full play.
Professional vs DIY: When to Consider Expert Installation
While a DIY approach can work for smaller residential projects, larger facilities often benefit from professional installation.
Professional contractors ensure:
Regulation-accurate measurements
Proper surface profiling
Slip-resistant textured coatings
Long-term UV resistance
Even, consistent striping
For property managers or facility operators seeking long-term durability, Ace Coatings South provides athletic surface systems engineered specifically for outdoor performance in demanding climates. Their experience ensures proper adhesion, surface correction, and consistent line quality.
Paint vs. Temporary Court Tape
If you need a short-term solution, removable court tape may suffice. However:
Paint Advantages
Long-term durability
Professional appearance
Lower long-term cost
UV-resistant finish
Tape Advantages
Quick installation
Removable
Ideal for temporary setups
For permanent conversions, paint remains the superior choice.
Final Curing and Maintenance Tips
After painting:
Avoid foot traffic for 4–8 hours
Avoid gameplay for 24–48 hours
Clean regularly to prevent dirt buildup
Inspect annually for touch-ups
Proper curing and routine maintenance extend the life of your lines significantly.
Ready to Paint Pickleball Lines on a Basketball Court?
Transforming your existing basketball court into a dual-use recreational space is a practical, value-driven upgrade. With accurate measurements, thorough preparation, and proper athletic coatings, your court can deliver years of reliable performance.
If you want expert-level results, regulation accuracy, and durable sport coatings designed for long-term outdoor performance, professional installation may be the right choice.
Contact us at Ace Coatings South today to schedule a consultation and receive a professional quote for your court striping project.
